Valve actuation time
Microfluidic Recirculation Valve
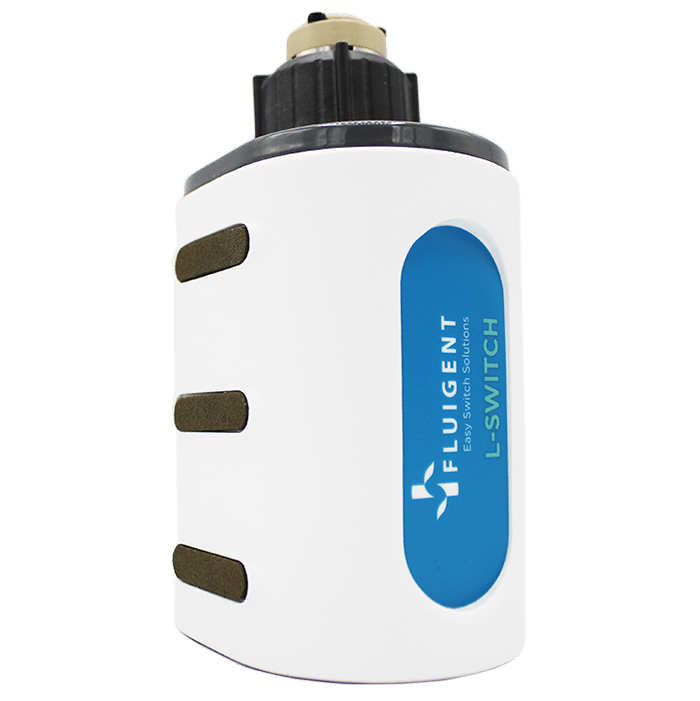
[LSW001]L-SWITCH™ 6-port/2-position
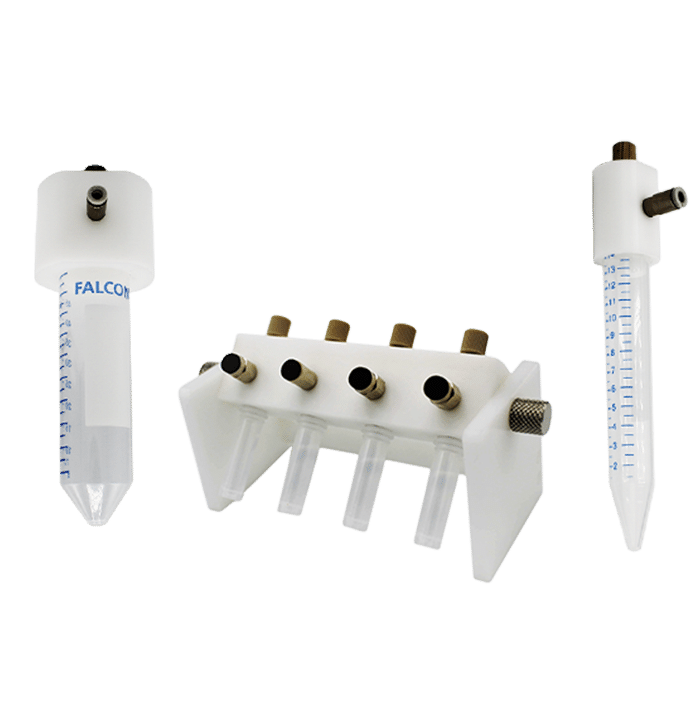
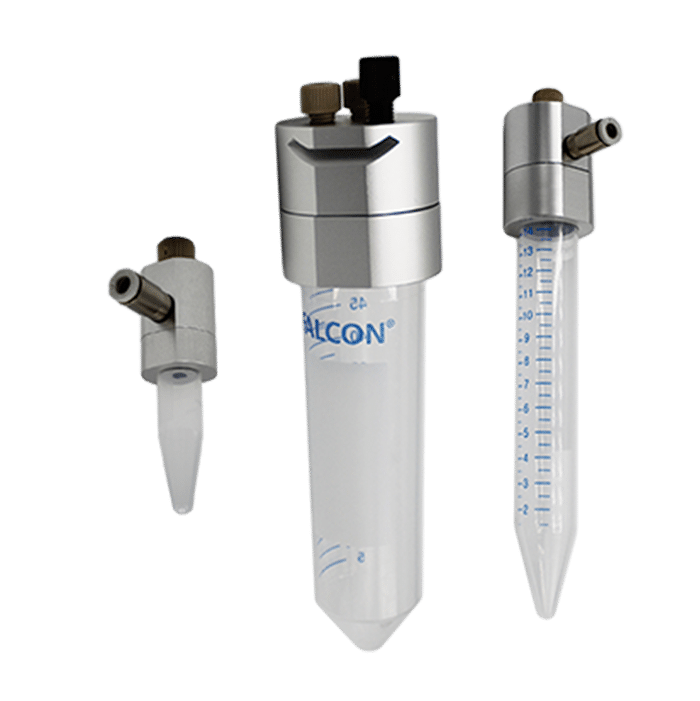
The L-SWITCH™ is a 6-port/2-position bidirectional microfluidic recirculation valve used to handle liquids through different valve ports. It is ideal for liquid recirculation in cell culture applications, allowing to perform long-term unidirectional recirculation flow.
Main benefits
 Quick
Quick- Compact
Uses minimum bench space
- Biocompatibility
Biologically compatible
- Accurate
Low internal volume
Features of the recirculation microvalve
6-port/2-position
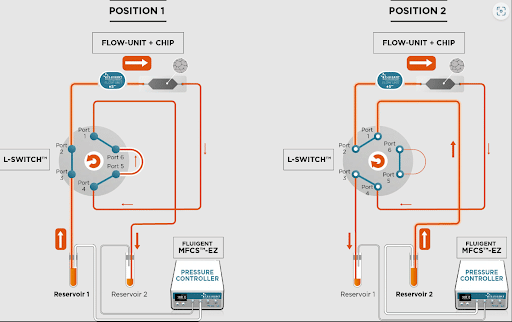
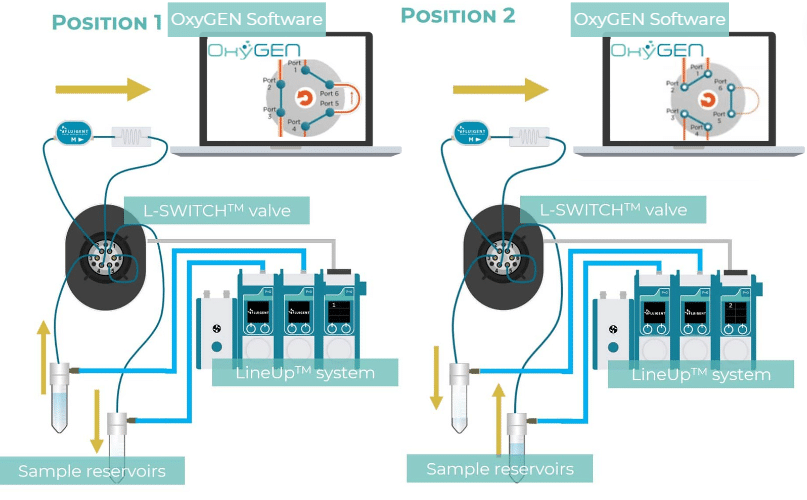
Peripheral ports (numbered from 1 to 6) can alternatively be connected to the right or the left channels. The L-SWITCH™ is actuated by a motor that drives a rotor – where the fluidic path is engraved – against a stator – containing the fluidic paths.
Fluid recirculation
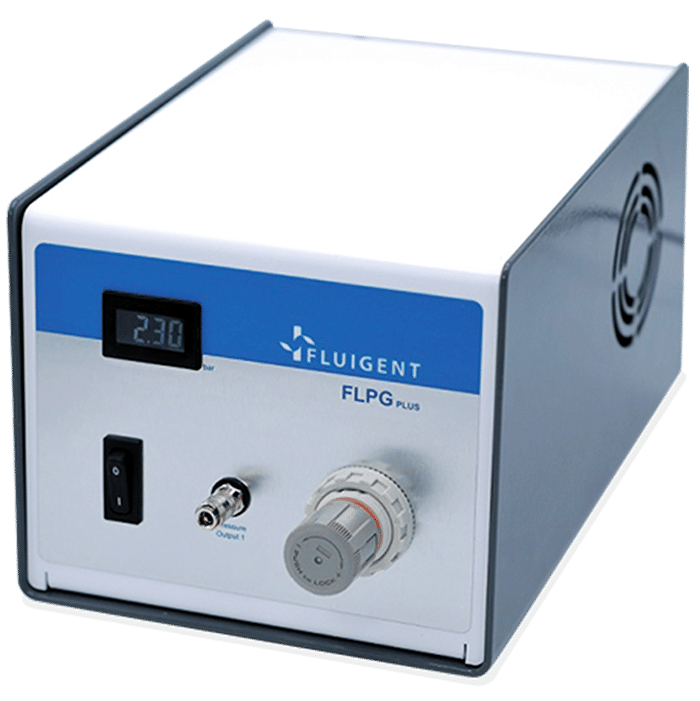
The L-SWITCH™ is a microfluidic recirculation valve that can be used as a cell culture tool : a small volume of buffer can be recirculated within a closed loop into the chip for several hours or days. Combined with our MFCS™ series or LineUp™ series it can achieve a highly stable flow with a positive impact on the shear stress.
Workflow automation
The recirculation microvalve can be controlled by OxyGEN software or long-term experiments. Create a time-based protocol to set the actuation timing of the valve(s).
Control software allows back and forth flow between the two vials while maintaining a continuous unidirectional flow-rate within the cell culture chamber.

Smart control and automation of your fluidic path
Discover Fluigent microfluidic valves, a set of compact instruments allowing to complexify and easily handle the fluidic path of your system. Once integrated in the set-up, the valves can be controlled in real-time and even without the requirement of a PC.
How to perform fluid recirculation with microfluidic valve
Many microfluidic applications require expensive solutions to be recirculated at a controlled flow rate into a microfluidic system, such as cell cultures, cell injections, or simulation of blood capillaries with a controlled minimal mechanical stress.
The L-SWITCH, combined with Fluigent’s pressure-based flow controllers, allows to recirculate a fluid in a closed loop, to run and automate long-term experiments, and to increase experimental versatility thanks to its high biological and chemical compatibility.
The 6 inputs and 2 interchangeable configurations of the microfluidic recirculation valve are represented in the images below. According to the configuration, each input is connected to an output that is either on the right or left of its neighbor.
We have demonstrated the ability to maintain a stable flow rate, without changing the yield stress, in a medium over cells during a long-term recirculation experiment using our L-SWITCH™. Check out our Technical Note to learn more!
Benefits of the L-SWITCH recirculation valve
- No overpressure: Switch between 2 flow configurations in less than 100ms
- No waste: No dead volume and low carryover volume.
- Biocompatible: High chemical and biological compatibility
- Reproducibility and Reliability: Perform identical recirculations over and over
- Small buffer volume
- Controlled shear stress
- Long-term experiments
- Flexible automation
- Pressure and/or flow-rate control and limit
Specifications
PERFORMANCE
| Switching time | 100 ms |
| Maximum pressure | Up to 7 bar (100 psi) |
HARDWARE SPECIFICATIONS
| Internal volume | 660 nL |
| Wetted materials | PEEK |
| Dimensions | 70 x 90 x 150 mm |
| Weight | 475 g |
CHEMICAL COMPATIBILITY
| Gas compatibility | Dry, oil-free gas, air, any non corrosive or non explosive gas |
| Liquid compatibility | Aqueous solvent, oil, organic solent, biological sample |
OxyGEN
| Control in real-time, protocol automation, data record and export |
| ver. 2.2.0.0 or more recent |
Software Development Kit
| Custom software application |
| ver. 22.2.0.0 or more recent |
Expertise & resources
-
Product presentation videos MICROFLUIDIC VALVE AUTOMATION: How to make it easy [SWITCH EZ] – Fluigent Read more
-
Microfluidics White Papers An exploration of Microfluidic technology and fluid handling Read more
-
Fluigent Products Datasheets L-SWITCH™ Datasheet Download
-
Fluigent products manual Easy Switch Solutions User Manual Download
-
Microfluidic Application Notes Peristaltic Pump vs Pressure-Based Microfluidic Flow Control for Organ on Chip applications Read more
Related products

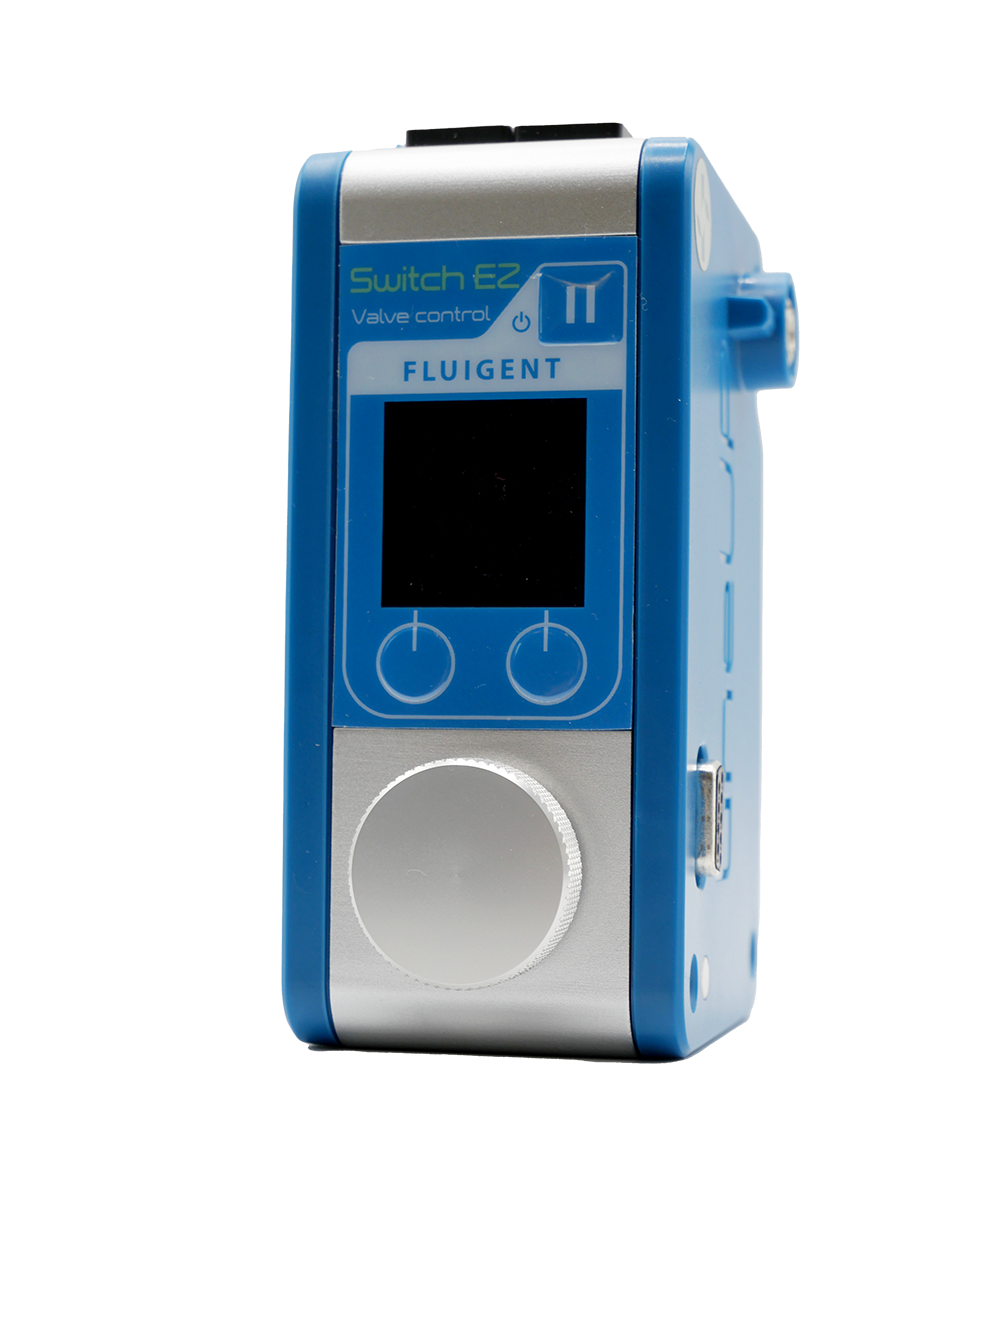
Microfluidic valve controller for flow redirection
Microfluidic valve controller for flow redirection
See the offer-
Microfluidic Sampling Valve
Microfluidic Sampling Valve
See the offer -
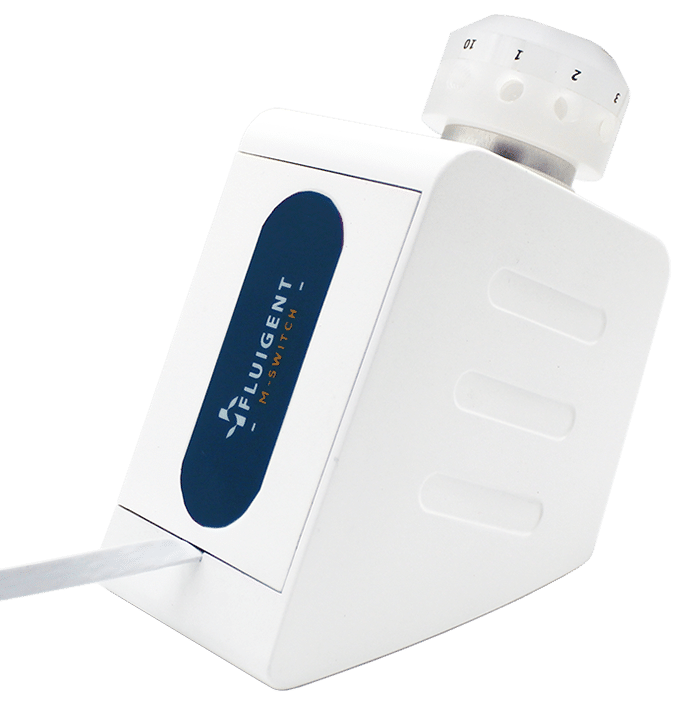
M-SWITCH™ Microfluidic bidirectional valve
M-SWITCH™ Microfluidic bidirectional valve
See the offer -
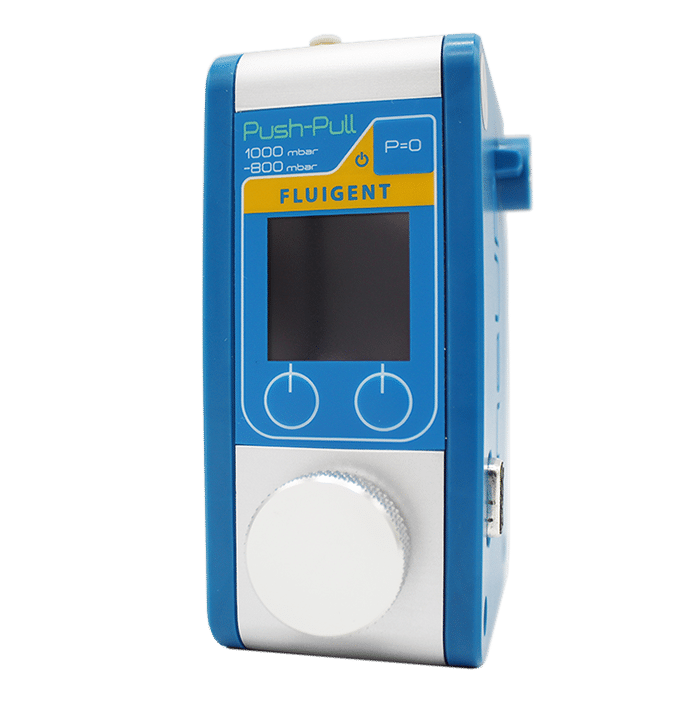
Microfluidic Push Pull controller
Regulate negative and positive pressure
See the offer -
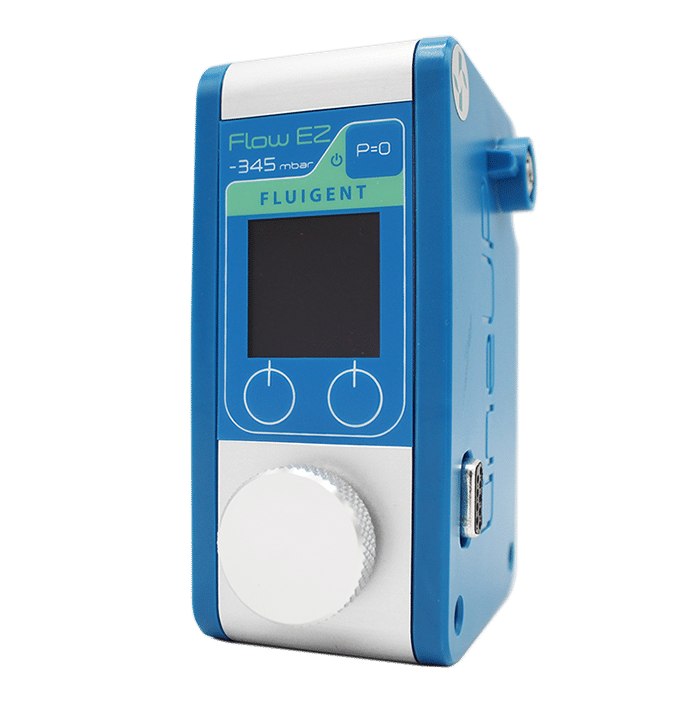
Microfluidic flow controller
Microfluidic flow controller
See the offer